Single Fiber Connector Cleaning and Connection
Dirty connectors are one of the biggest problems in fiber optic networks, leading to connector loss, high reflectance and contaminated transceivers. Network operators claim that 15-50% of all network problems can be traced back to unclean connectors causing connection problems.
A single dirty connector can significantly impact the performance of applications running through that link. With less tolerance for overall light loss, the attenuation through the adapters decreases making proper inspection and cleaning absolutely critical.
Why clean fiber optic connections?
- Clean connectors maximize the performance of the network and reduce installation time
- Proper cleaning saves money by eliminating service calls caused by dirty connectors
- Proper cleaning extends the life of connectors and reduces replacement costs
Cleaning fiber connectors is one of the most straightforward but overlooked parts of fiber optic maintenance, however, executed properly, could prevent a significant amount of network fiber link failures.
Guide to best practices of single fiber cleaning
NOTE: Pictures in these instructions are for demonstration and should be applied to the following types of connectors: LC, SC, ST, E2000, FC, MU, SMA, DIN.
- Keep dust cap on the connector until ready to connect, remove dust cap prior to inspection and installation.
- Use a fiber inspection probe to inspect the end face of the connector to ensure there is no contamination. If contamination is found, continue with step 3, otherwise, connect immediately.
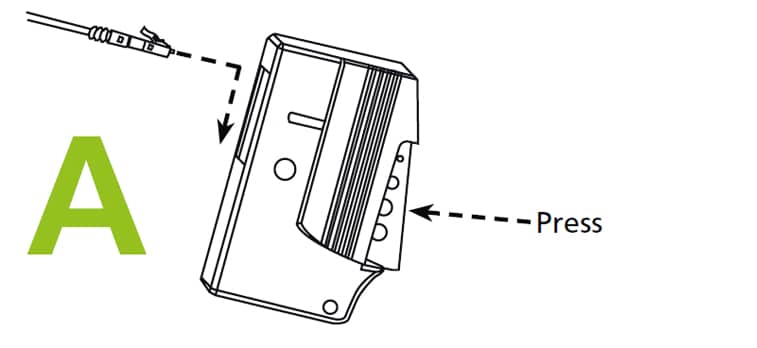
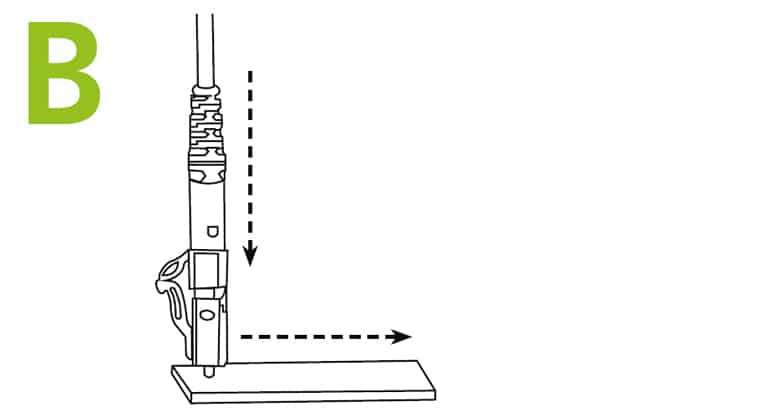
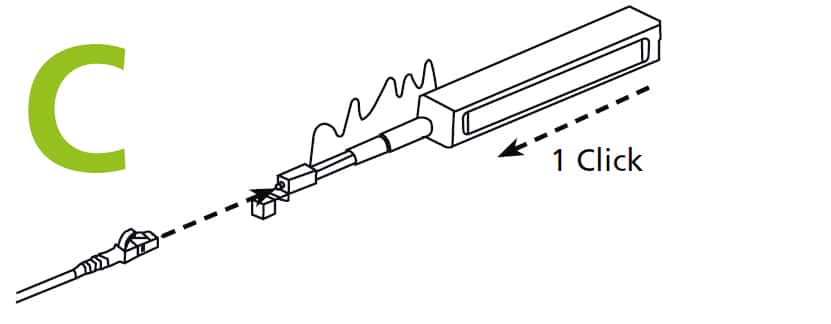
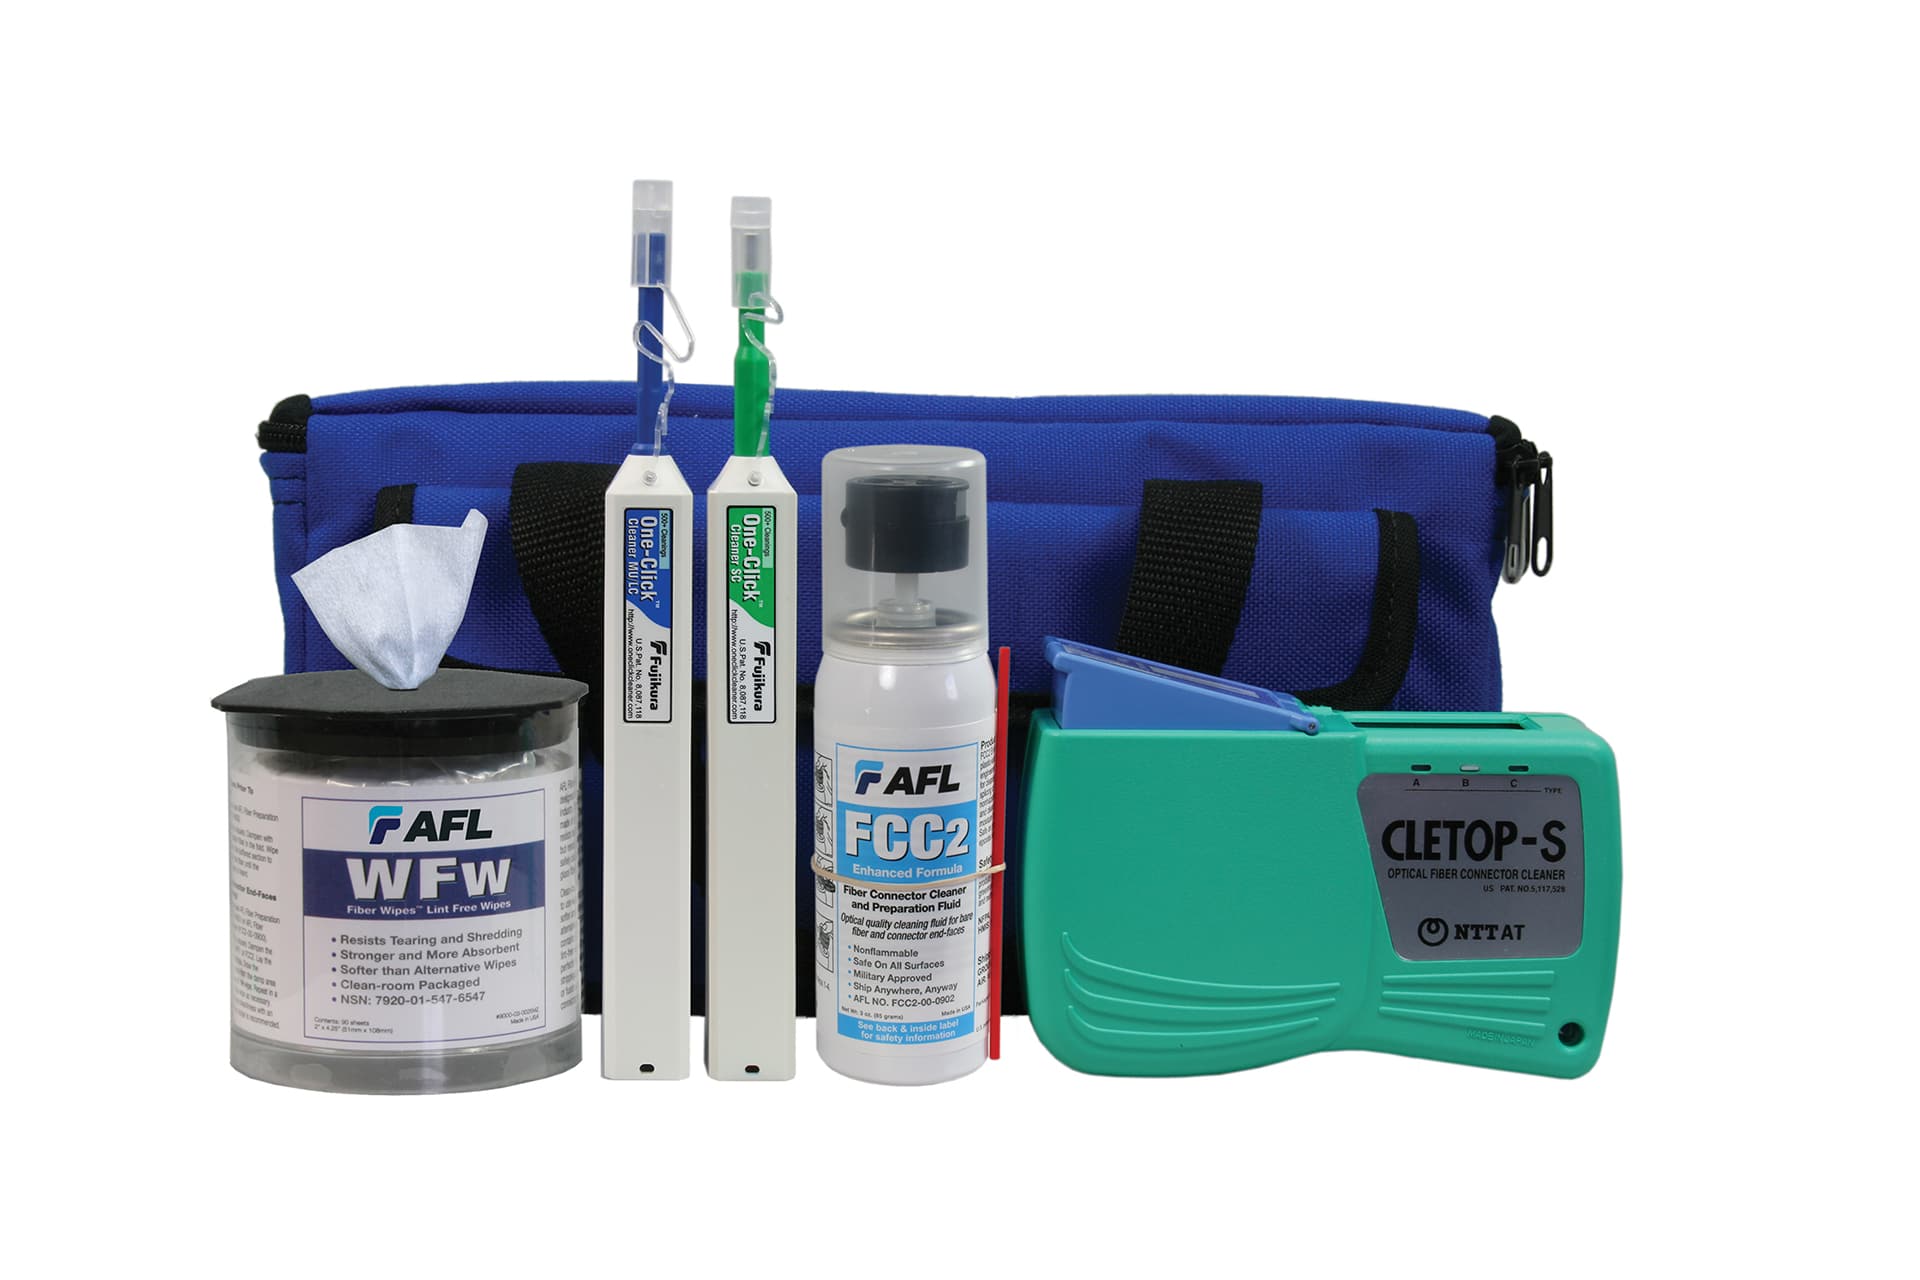
- Clean the connector end face with one of the following methods:

Cleaning Cassette: Apply a small amount of pressure and wipe the connector on the cleaning surface.

Wet a small area of lint free cleaning wipes with >99% isopropyl alcohol. Starting at the wet area apply light pressure and wipe the connector into the dry area.

Use an appropriate click-cleaner with a built in or separate adaptor. 1 click is recommended.
- Check the end face of the connector by repeating step 2.
- Once satisfied that the connector is free of contamination or defects, immediately install the connector into the adaptor or transceiver.
- Attach the connector into the adaptor by aligning the key on the connector with keyway in the adapter. For latch-type or push/pull connector, push the connector until it “clicks”, otherwise engage secure mechanism (i.e. screw thread or bayonet fitting) as appropriate.
Warning:
Do not attempt to connect a flat polish connector to an angled polish (APC) connector. This may damage the end face.
NOTE: Whenever you are reconnecting a connector, refer to cleaning instructions


